
Audience: Administrators
Overview
Workday is a Human Resource Capital Management solution. OrgChart directly connects with Workday. The following article provides information on:
- Frequently asked questions about OrgChart's integration with Workday (RaaS)
- Instructions on how to configure your Workday account to integrate with OrgChart
- Instructions on how to set up a Workday (Raas) integration in OrgChart
- Instructions on how to pull photos from Workday (RaaS) into OrgChart
OrgChart can connect directly to Workday using Workday RaaS. The following is a list of frequently asked questions (FAQs) pertaining to Workday integration with OrgChart.
Workday (RaaS) integration FAQ
-
How do I set up my connection to Workday?
Reference the Workday Connector Setup article below.
-
Can I pull photos from Workday into my org charts?
Yes. Reference the Workday Photo Configuration article for more details.
-
Can I limit the fields that a user is able to pull from Workday?
Yes. OrgChart will only import the fields included in the imported RaaS report.
-
What fields can I pull from Workday?
Almost any Workday field can be queried.
-
Can I merge data from a secondary source with Workday data?
Yes. In fact, OrgChart can combine multiple Workday reports into a single chart
-
Can I embed org charts (generated from Workday data) into my intranet?
Yes. You can embed live charts in your intranet – these charts can be set to auto-sync with Workday. Set and forget.
-
Can I add open requisitions into my org charts?
Yes. You can append your Workday data with data from your Applicant Tracking System. Reference the Append Data Connector page to verify that OrgChart supports your Applicant Tracking System.
-
Can I filter which records are included in my org charts?
Yes.
Configuring your Workday account for OrgChart integration
OrgChart uses Workday RaaS (Reports as a Service) to query data from Workday (Reference https://community.workday.com/node/134011 for more information about Workday RaaS).
To begin the integration, Administrators must set up an Advanced Report Type custom report in Workday, so that web services can be enabled.
-
Sign in to Workday.
-
In the Search bar, type Create custom report.
-
Click the Create Custom Report task. The Create a Custom Report page is displayed.
-
Type "OrgChartData" into the Report Name text box.
-
Enter the name of the data source (from which you will be extracting your Workday Data ) in the Data Source text box (i.e., All Active Employees)
-
Select the Enable As Web Service option.
-
Click OK.
-
Scroll down to the Additional Info section, and then click on the Columns tab.
-
Enter the name of the fields you wish to include in the report in the Fields text box.
-
Click the + icon (to the left) to add more fields to the report.
-
Add (at least) the following required prompts to the report:
-
Emplid
-
ManagerEmplid
-
Name
-
BusinessTitle
-
-
Click on OK, and then click Done.
-
Search for the newly created custom report in the search bar.
-
Click on the Actions tab, and then click on Web Services.
-
Select the View URLS option.
-
Right click on JSON, and then click Copy URL.
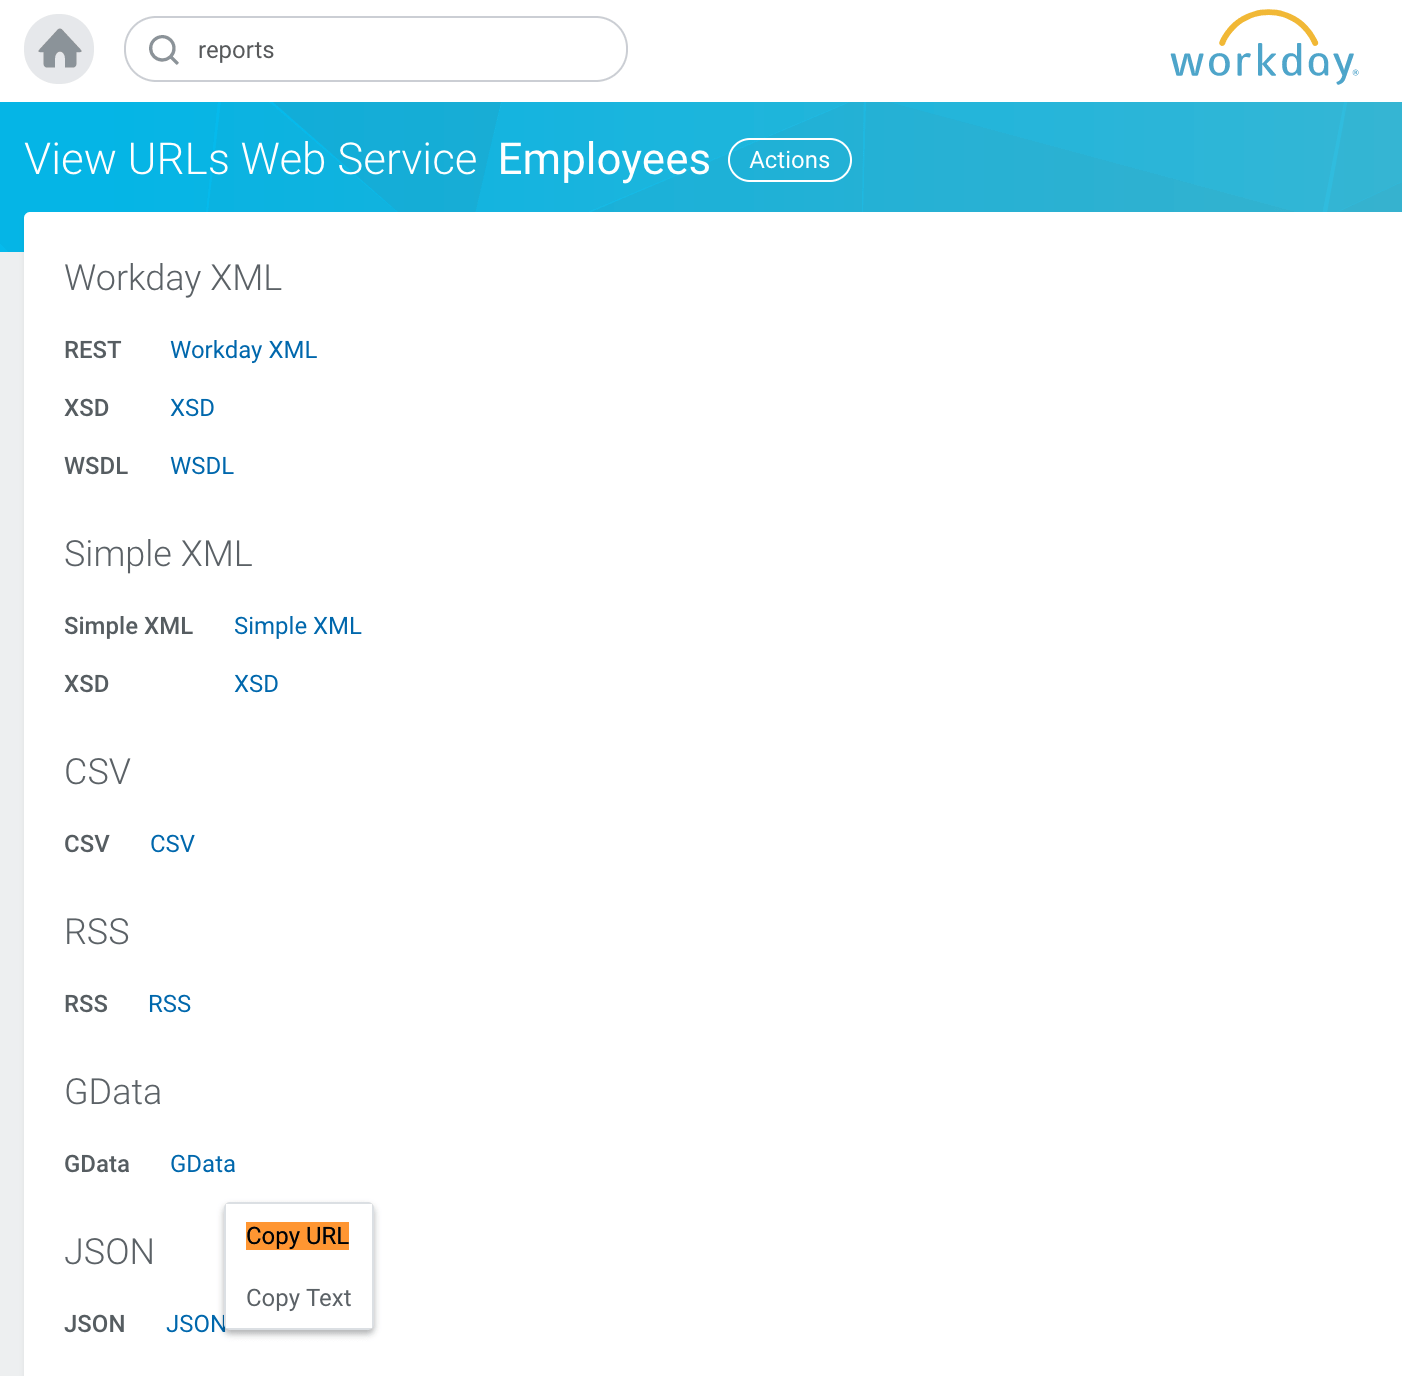
-
Paste this URL is a separate document, as you will need it to finalize your Workday connector setup.
Setting up your Workday (RaaS) integration in OrgChart
1. Click on the Settings button in the bottom right corner, and then select the Chart Settings option from the list.

2. The Data sources panel is displayed. Under the Main data sources heading click on the connector icon and then click on (Workday RaaS).

3. Enter the following information into the corresponding text boxes:
-
User Name - User name of the Workday service user account that created the employee report
-
Password - Password for the Workday service user account
-
Endpoint - JSON URL copied in step 16 of the Workday Configuration steps mentioned above.
4. Click on the validate icon to test the credentials provided are valid.

Note
If authorization fails, a Failed Authorization alert is displayed, detailing the invalid credential(s). Re-enter valid credentials, and then re-test until you receive a successful authorization.
5. Click on the yellow Configure Mapping button, and then click on Save Changes. The Chart Settings: Mapping panel is displayed.
6. Click on the yellow Load Mapping button.
7. Ensure that OrgChart has mapped the fields correctly, and then click on Save, and then Refresh.
Importing Workday (RaaS) photos into OrgChart
In order to pull photos from Workday (Raas) into OrgChart, you will need to:
- Configure a Workday (RaaS) photo report
- Set up Workday (RaaS) photo report integration in OrgChart
- Create a Workday(RaaS) photo formula
Configuring a Workday (RaaS) photo report
1. Log in to Workday.
2. Search for Create Custom Report.
3. Enter a report name (i.e. OrgChart Photo Report).
4. Select the Advanced report type.
5. Check the Enable As Web Service checkbox.
6. Uncheck the optimized for performance checkbox.
7. Select a data source that contains your employees (i.e. All Workers).
8.Click on OK.
9. Click on the + button under Columns to add a two new Business Objects.
10. Configure the Business Objects as seen below:
Note
Do not edit the Column Heading labels for the above fields
11. Click on the Filters tab, and then configure the filter as shown below:
12. Click on the Prompts tab, check the Populate undefined prompt defaults checkbox.
13. Click on the Columns tab, and then add a Group Column Heading as shown below:
14. Click on OK.
Setting up Workday (RaaS) photo report integration in OrgChart
1. Click on the Settings button in the bottom right corner, and then select the Chart Settings option from the list.
2. Scroll down to the Additional photo configuration section. Click on the Click here to select a data source hyperlink, and then click on the Workday option.

3. Click on Configure.

4. Enter the following credentials into the corresponding text boxes:
API User - Username of the API service user associated with your photo report
API Password - Password associated with the API service user
API Endpoint - Your Workday Photo endpoint with a valid Employee ID at the end
(EX. https://services1.myworkday.com/ccx/service/customreport2/companyname/user/OrgChart_Photos?format=json&Employee_ID=123)

5. Click on the Validate button to ensure that your credentials are valid.
Note
If authorization fails, a failed authorization alert is displayed, which details the invalid credentials. Re-enter valid credential, and then re-test until you receive a successful authorization.

6. Click on Save to preserve your changes.

7. Click on Save in the Chart Settings: Data sources panel, and then click on Refresh.

Creating a Workday (RaaS) photo formula
1. Click on the Fields & Formulas tab, and then click on the Create formula button and select the Static formula option from the dropdown menu.

2. Enter a name for the formula (i.e. Photo).

3. Click on the + button to add an operation, and then select the concatenate option.

4. Click on the + Add new value button.

5. Enter /workday/ into the textbox (as seen below).

6. Click on the + Add new value button.

7. Click on the Type dropdown menu, and then select the Field lookup option from the dropdown menu.

8. Select the value from your dataset that is mapped to PersonID in OrgChart (i.e. Employee ID).

9. Click on Save.

10. Click on Save in the Chart Settings: Fields & Formulas panel, and then click on Refresh.

Comments
0 comments
Please sign in to leave a comment.