
Audience: Administrators
Overview
Administrators can populate an Excel/CSV file with HR data, and upload that to OrgChart. Excel/CSV files require manual upkeep to reflect the most accurate records. This source is common for supplementing a main data source, or creating quick charts. However, it is not recommended for charts larger than 300 boxes.
The following article provides information on:
Preparing your Excel or CSV file for upload
OrgChart can import HRIS data from an .xlsx or .csv file, which necessitates manual upkeep to reflect the most accurate records. A flat file can be used as a Main Data Source, Append Data Source, and Merge Data Source.
The following section provides information on:
- Required fields for your Excel or CSV file
- How to structure a flat file
- How to create a valid org chart hierarchy
Required Fields
In order for the flat file to function properly, the following fields are required:
| PersonID | This is a unique code (at least 4 characters long) used to identify an employee. |
| SupervisorID | The PersonID of a supervisor, assigned to a direct subordinate in order to create the hierarchy. Each box needs another box to report to. The top box should report to itself, or no one. See the Creating a Valid Hierarchy section below for more information.a |
| Name | This field assigns a Person ID with a name to display on the chart. Additionally, providing a name allows you to use the search-by-name function. |
| Title | This field assigns a Person ID with a job title to display on the chart. This allows you to organize and filter data, as well as use the searching-by-title function. |
Note
Add additional fields by creating new headers and populating the column with at least one value assigned to an employee. Once loaded into the chart, you will see this field available in Chart Settings: Fields and Formulas.
Structuring the Flat File
In order for the flat file upload to be successful, your Excel must follow these guidelines:
-
Field names appear in the first row of the file
-
Required fields are present and populated
-
Every record has a unique Person ID
-
Every record, with the exception of the record that will appear at the top of the chart, has a Supervisor ID
-
The record without a Supervisor ID has a blank value or a value of -1 in the Supervisor ID column (do not use ##### or other symbols)
-
The reporting hierarchy is valid (see the Creating a Valid Hierarchy section below for more information)
-
The file is encoded in UTF-8
Creating a Valid Hierarchy
OrgChart uses Person IDs and Supervisor IDs to build your chart. The following section provides information on how to create a valid reporting hierarchy in a flat file.
Below is a screenshot of a dataset with a valid hierarchy.
Note that the Person IDs are all unique, and the Supervisor ID is the Person ID of the record to whom the assigned records report.

Joshua Ryor has a Person ID of 1001 and a Supervisor ID of -1, meaning that this record is at the top of the chart.
Pauline Dinh has a Person ID of 0159 and a Supervisor ID of 1001, meaning that she reports to the record with a Person ID of 1001 (Joshua Ryor).
When uploaded to OrgChart, the dataset shown above generates the following chart:

Uploading an Excel/CSV file as an Main data source
The following section provides information on how to upload an Excel or CSV file as a main data source.
1. Click on the Settings button in the bottom right corner, and then select the Chart Settings option from the list.

2. The Data sources panel is displayed. The various data sources are is listed under the Main data source heading. Click on the Click here to select data source button to select the data source.

3. From the Select data sources dialog box, click on Excel or CSV as required.

4. Click on the gear icon to open the configuration dialog box.

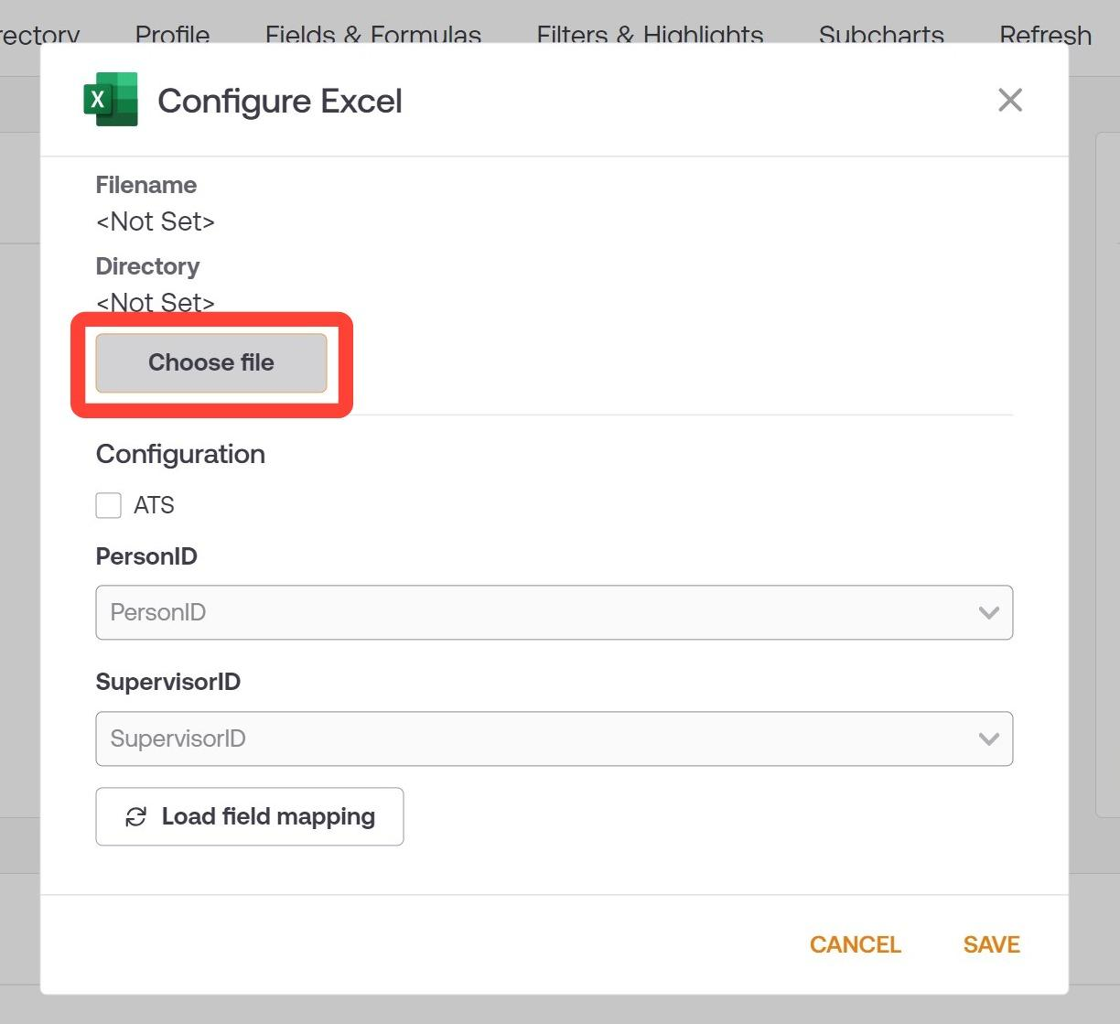
5. Once the configuration box open, click on Choose file , select the required file and click on save.

6. Click on Save in the Chart Settings: Data sources panel to preserve your data source selection, and then click on the Configure field mapping button.

7. Click on the Load field mapping option.
Note
If OrgChart does not identify the correct field from your data source, click on the dropdown menu associated with that field, and select the correct one. Additionally, if the fields are not able to populate automatically, click on the Edit button associated with each field, and manually type the name of the field from your data source.
8. Click on Save in the Chart Settings: Mapping panel, and then click on Refresh.

Adding new records to an existing org chart using Excel or CSV
To display records in your chart that are not apart of your HRIS, and do not exist in an Applicant Tracking System, use a flat file (containing the required fields) to append them.
The following section provides information on:
- How to structure an Excel/CSV file to add new records to an existing org chart
- How to upload an Excel/CSV file as an append data source
Structuring an Excel/CSV file to add new records
As discussed in the Creating a Valid Hierarchy section above, OrgChart uses Person IDs and Supervisor IDs to build your chart.
Records that do not exist in your HRIS still require a unique Person ID. Create the Person IDs yourself, ensuring that they meet the following criteria:
-
Person ID is at least 4 characters long
-
Person ID is unique to the one employee record
The following screenshot provides an example flat file used for appending non-HRIS records to a chart

Jacob Findalay, Frida Benyon, and Austin Gray are consultants that do not exist in the HRIS data.
They have been assigned the unique Person IDs CON001, CON002, and CON003 respectively.
Jacob Findalay, Frida Benyon, and Austin Gray each have the same Supervisor ID, meaning that they all report to a record with a Person ID of 1439.
When uploaded to OrgChart as an Append File , the dataset above generates the following chart:

Note
This naming convention for person IDs (CON###) allows Administrators to easily locate the consultants in the dataset, as well as track the use of the unique Person IDs. Additionally, this naming convention could be used to target consultants with conditional formatting.
Other popular naming conventions for Person IDs are:
-
VAC### for vacancies
-
INT### for interns
-
PLC### for placeholder boxes
Uploading an Excel/CSV file as an Append data source
1. Click on the Settings button in the bottom right corner, and then select the Chart Settings option from the list.
2. The Chart Settings: Data sources panel is displayed. Click on the Add data source button in the Append data source section.

3. Click on the Choose file button, and then select your append data source from the file manager.
4. Click on the Load field mapping button.

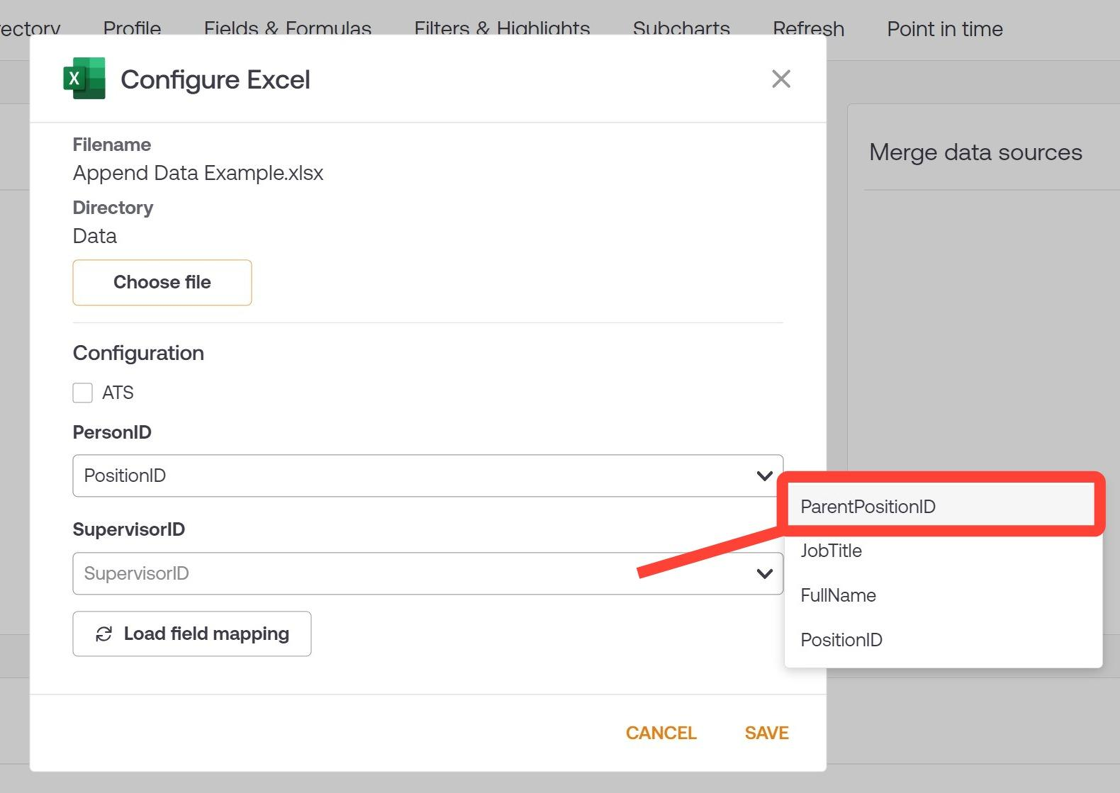
5. Click on the PersonID dropdown menu, and then select the field from the append data source that should map to PersonID.

6. Click on the SupervisorID dropdown menu, and then select the field from the append data source that should map to SupervisorID.
7. Click on Save.

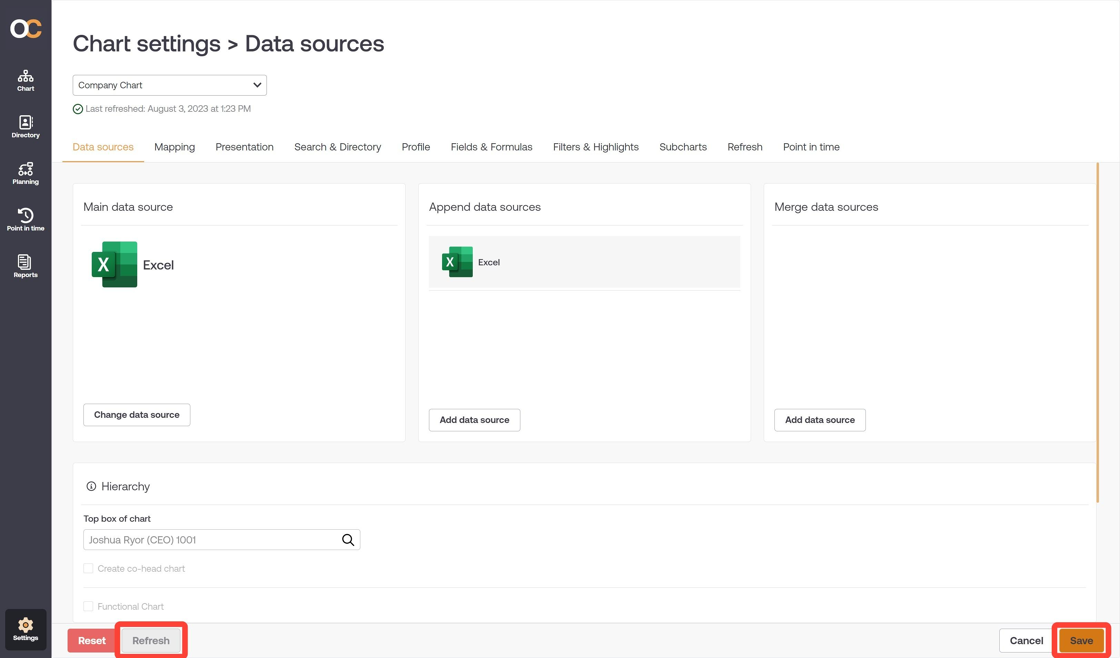
8. Click on Save in the Chart Settings: Data sources panel, and then click on Refresh.
Comments
0 comments
Please sign in to leave a comment.